Pages

Tuesday, May 31, 2011

Lake Plans

We did a lot of tidy-up work at our lake place this long Memorial Day weekend. We now have our plans in place to repaint our place and finish staining the deck. All very necessary, although slightly boring (sorry hubby!), sooooo...... I still like to dream up a few exciting projects for after all the boring maintenance, but totally necessary chores!

It is SO funny I found this picture TODAY of all days. I have had this idea in my head FOREVER. Constructed one, then decided I wanted to make it bigger, so, of course it sat there for ages, all because I needed more besser blocks and could never find the perfect time to go to the store to get them. 

Better Homes & Gardens

So finally my husband "convinces" me to pull it apart so he can make this (we have never seen these pictures before!):  

Better Homes & Gardens

Although we only constructed one section I think it would look great to add more like this:

Better Homes & Gardens

I would like to add in a few very low-maintenance plants, like these:

Better Homes & Gardens

I love the casual feel of this sitting area - this would be great around our fire pit/grill:
Better Homes & Gardens

And I love this string of lights - would look fantastic under the trees:
Apartment Therapy


But first I MUST order the paint and buy more stain and come back to reality just for a few more weeks, then I'm off again dreaming up more things to annoy my husband with to do :)

 Oh, and of course I have no photos of our place to show you - BLAH to me! - I guess we were just too busy, but promise next time I will.

Girls' Bedroom - List

OK, here we go - please don't freak out - most of this list is little things that can be done quickly. Lists are also great to give to a starting point, and a finishing point! And, of course, can easily be changed along the way ;)

TO DO:

DRESSER:
* Paint dresser
* Distress edges on dresser
* Seal dresser
* Put on drawer hardware
* Clean inside drawers
* Buy paper for inside of dresser drawers
* Decoupage inside of dresser drawers
* Move old dresser out of room
* Move to new dresser into room
* Put clothes into drawers

BEDSIDE TABLE:
* Paint bedside table
* Distress edges on bedside table
* Seal bedside table
* Put on bedside table hardware
* Clean inside drawers
* Buy paper for inside of bedside table drawers
* Decoupage inside of bedside table drawers
* Move to room
* Put clothes into drawers

BEDS:
TWIN:
* Paint headboard
* Distress edges on headboard
* Seal headboard
* Secure on to bedframe
* Iron bedskirt
* Put onto bed
* Put on quilt and new pillow sham
* Make more pillows for bed 
TODDLER:
* Decoupage or disguise bed (instead of painting it)
* Make quilt for bed
* Make pillows for bed

WINDOW:
(the kids pulled down the curtain and, subsequently, pulled out the curtain rod fixture!) 
* Fix holes in wall
* Sand and repaint
* repaint curtain hardware from black to distressed white
* Put up new curtain fixture/rod
* Clean window inside and out
* Iron Pottery Barn sheer curtains and put up
* Reorder more white minky material for curtains (how annoying - I didn't order enough first time - grrrr, at myself!)
* Make minky white curtains with black-out backing (one kid still has daytime nap, and I really want that to continue FOREVER. Well. OK, maybe not forever, but how about for the next 7 years! OK. maybe just 2 more years.)

ACCESSORIES:
* Paint picture frames pink and frame horse pics
* Paint shadow boxes white and frame baby dresses
* Make bible verses for each girl
* Re-do initials
* Accumulate accessories from antique stores/Goodwill for room
* Move pictures around to suit new furniture arrangement
* Place ballerinas on dresser
* Make or buy another pink shade for second lamp
* Make flags for wall
* Make flower wreath mobile


I have done a few things, as you can see, but still a lot more to go! OK - I think I'm about to pass out, and all I have done it make up the list - aaggghhhhh.....

Thursday, May 26, 2011

Girls' Bedroom - Inspiration

The two main sources I have for inspiration for the girls' room are Restoration Hardware and Jones Design Company.

I ABSOLUTELY LOVE everything from both these sites. Restoration Hardware is a store - beautiful furniture and accessories - I would fill my house with their items if I could! It is a little pricey, but I'm sure it would be worth it. Their photos are so beautifully shot, FULL of lots of inspiration, and things you could easily copy at home yourself.

Jones Design Company is a decorating/craft/design blog. Emily Jones is a designer of stationery {and other things} and a business owner. She has a beautiful blog FULL of awesome tutorials, giveaways and beautiful decorating ideas.

From Restoration Hardware I chose this room, for its neutral walls, and simple but sweet soft pink-ness! It is not over-bearingly pink that it will permanently disturb my husband, but just enough to satisfy my pink-loving girls.


Furniture:
I also really like the soft gray furniture, but think I will paint mine white instead. I think it would be a little more versatile in white. We have a twin bed and a toddler bed. I have bought headboards at a local second-hand store, which I will also paint white. I'm currently working on a big set of drawers, and a bedside table that will sit in between the two beds. I don't think I will have room for any shelves - I think it will look to cramped in there, but we shall see. My headboards look more like these, but no footboards:


Bedding:
The bedding I will keep in that soft pink, and I found some at Target - the Shabby Chic collection - Simply Shabby Chic Ruffle Jersey Sheet Set - Pink (Twin). I also bought the matching bed skirt from the Shabby Chic collection.  For the quilt I went for a slightly darker pink - it was $30 (Circo Basic Quilt Set) compared to the $90 Shabby Chic coverlet. It is light enough for summer, and then I will layer it with soft blankets for winter. I also bought a contrasting pillow cover from Shabby Chic - a standard quilt sham (sorry, I cannot find it on-line for a link) - I just couldn't resist! If you are looking for well-priced bedding also keep checking Ross, TJMaxx and HomeGoods - all excellent sources for awesome quality bedding at discounted prices.

Accessories:
I'm going to frame a couple of sweet baby dresses from the girls in shadowboxes, and I am also doing a little collection of pink painted frames with horses in them - both girls LOVE ponies!

From Jones Design Company, I love her little girl's nursery room:


Accessories:

I love how she brought the antique elements into the little girl's room - they look so sweet and give the room depth and history. I'm going to try to redo the girls' name - maybe frame their names like Emily has done, or maybe just rework their initials. I also LOVE the bible verse - this will be incorporated into their room and I'm thinking I will take her lead with the lamp print she did for her office - the relationship of their name to the bible - awesome! I also love the pillows and plan to make lots of lovely pillows for the girls' room. I would love to do a chandelier but it gets kind of hot here in Texas and I think we need to keep the fan. Maybe I can jazz it up a bit?? Mmmmmmm..... :)

OK, so there you have it. This is my starting point. Next post will be THE LIST. And good grief, what a list it is - I'm already exhausted just thinking about it!

Girls' Bedroom - Before

I have started to work on the girls' bedroom. I finally gave in and sold the cot so I could move my 2 (almost 3yr old) to the toddler bed (she never did learn how to climb out of her crib), and my 4 (almost 5yr old) to a "big girl" bed. I think my 4yr old had outgrown the toddler bed, as she was making her way into our bed EVERY night. It was looking at little uncomfortable for her. (She has slept in her new bed every night since we bought it - :) success!!). And my 2yr old is as proud-as-punch about getting her own version of a "big girl" bed. My only fear was that she is the early riser, and sure enough, she is the one that comes in and wakes us EVERY morning! Sometimes she gets in and cuddles and goes back to sleep (which is super cute), other times...well, I guess that is to be expected.

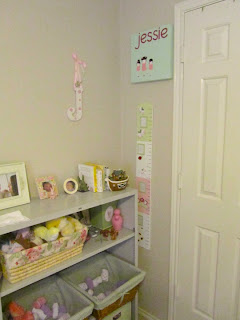
So anyway, back to the room. I have a few inspirations of what I would like the room direction to go, but firstly, for this post, here are the before photos (but after the cot was replaced by the big bed).

Over the next number of posts I'll describe my inspiration, how I'll incorporate them into our room, the lists of things to do, how I did them, where I sourced stuff, and the final reveal - exciting stuff here people!

So, the BEFORE:


So, as you can see, there is a lot of stuff going on in here. I really need to clear out the clutter, reorganize, and simplify. Next post will show my inspiration :)

Friday, May 20, 2011

Next Inspiration

TOTALLY LOve this artwork on the wall!! This must go into our bedroom...somehow. These colors are perfect. Also LOVE the pillows - so sweet. You could adjust the words to whatever means something to you -

whisper 
sweet 
nothings

sweet
dreams
love

love 
you
forever

be
mine
always


I might "adjust" the canvas I have in our bedroom into this, or start again. The cushions/pillows will be easy (I think). I found a stencil font, printed them out big onto paper - hopefully I'll be able to paint the words onto the material (with fabric paint).

I will keep you posted :)

Thursday, May 19, 2011

Latest Art Piece

I remembered I had this lovely picture from an old calendar hiding in my drawers somewhere, and thought it would be perfect for an art piece for my bathroom, to complement the old key piece I did recently.

I also had the perfect frame - a Goodwill find. So after a little searching, a little inspiration, and just a few quick minutes of construction, here it is:

1. Measure picture and work out positioning in the frame.


2. I framed the picture with pages from A Midsummer Night's Dream, so I cut out the pages and taped and glued them in place (taped where it wouldn't show, and glued where the page was the top page).


3. Trim the excess so it is same size as the backing, so it will fit into the frame.


4. Position it all inside the (newly cleaned) frame :)


I know my photos are crazy - I'm trying to work out how to get them looking right, so please bear with me ;)

Dream Kitchen

This would be my dream kitchen:


So pretty, perfect layout (we have a gallery-style kitchen). Love the floors. Love the white, the light. Simple but inviting. Ahhhhh.....

New Shoe Area

Found a great seat at Ross - just perfect to store our shoes that we use most often, and perfect place to sit the girls to put their shoes on.

Originally the shoes were housed in a box in the kitchen bookcase. You would have to get the shoes then decide where to sit to put them on, which for the kids was usually on the floor. I just wasn't too fond of them sitting on the floor, and didn't particularly like stooping over that far. So this was the perfect solution for us.

One reason I like to do this blog and post pictures is it gives you a different perspective of the room or area you are decorating. Things look so different in real life compared to in a photo, but the photo gives you a better overview and can show you what more you need to work on, or what works.

I think I still need to tweak the china cabinet, and I need some more art work up on another wall, that you can't see. But in general this area (our breakfast/dining area - since I converted the actual dining room into our playroom/my office) is looking a lot better/ more cozy/ homely.


I would also like to replace the light fixture - it is a little outdated and not our style. Need to repaint, if I can ever make a decision on what color to go for the kitchen redesign. I would really like to convince my husband to let me paint the kitchen cabinets white, go with a .... well I guess that really should be another post :)

Wednesday, May 11, 2011

Fred Astaire

Just read it is Fred Astaire's birthday today. Fondly remember watching old movies when I was young, and always loved his ones - lots of beautiful dancing. What a talent he was! Who wouldn't want to dance with Fred Astaire!